DeLonghi All in One Espresso Machine How to Use: Master Every Brew
So you’ve just unboxed your shiny new DeLonghi all in one espresso machine, and you’re staring at it wondering where to even begin, right? I get it. These machines look complicated at first glance, but here’s the good news: once you understand the basics, you’ll be pulling café-quality shots in your own kitchen. Let me walk you through everything you need to know to become a true espresso master with your DeLonghi machine.
Understanding Your DeLonghi All in One Espresso Machine
Before we dive into the actual brewing process, let’s talk about what makes your DeLonghi machine special. Unlike traditional espresso machines that require you to be a barista to operate, DeLonghi’s all in one systems are designed with home users in mind. They combine multiple functions into one sleek device, which means you can make espresso, cappuccino, lattes, and even regular coffee without needing separate equipment cluttering your counter.
Think of it like having a Swiss Army knife for coffee. Everything you need is built right in, which eliminates the learning curve and the need to purchase additional accessories. The machine typically features an automatic milk frother, adjustable grind settings, and programmable buttons that remember your preferences. This is what separates DeLonghi machines from the competition.
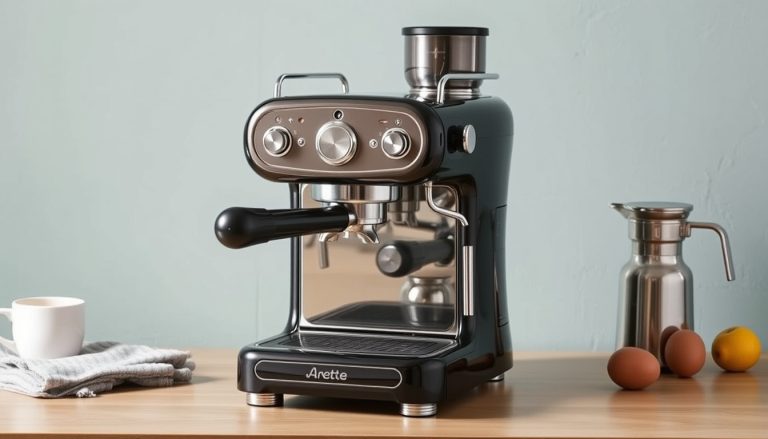
Key Components You Should Know
Getting familiar with your machine’s anatomy is the first step toward mastery. Your DeLonghi all in one espresso machine has several essential parts that work together in harmony:
- Water Tank: This is your liquid fuel. It’s usually located at the back or side of the machine and holds enough water for multiple drinks.
- Bean Hopper: This sits on top and stores your whole coffee beans. It’s connected directly to the integrated grinder.
- Grinder: Built right into the machine, this automatically grinds your beans to the perfect consistency for espresso.
- Portafilter and Group Head: Where the magic happens. The portafilter holds your ground coffee, and the group head is where it locks in.
- Milk Frother: This creates that silky microfoam you love. It can be automatic or manual depending on your model.
- Drip Tray: Catches excess water and keeps your counter clean.
- Control Panel: Your command center with buttons, dials, and maybe even a touchscreen depending on your model.
Getting Started: First Time Setup and Preparation
Your first brew is exciting, but let’s make sure you do it right. There are a few preliminary steps that every DeLonghi owner should follow before pulling that first shot.
Cleaning and Descaling Before Your First Use
I know, I know—you want coffee now, not a cleaning session. But trust me on this one. Your DeLonghi machine has been sitting in a warehouse, and internal parts need flushing before they touch your precious coffee. Run water through the system a few times without beans or coffee to clear out any manufacturing residue. This protects your machine and ensures your first cup tastes exactly how it should.
Descaling should happen every three to six months depending on your water hardness. Use DeLonghi’s official descaling solution, follow the manufacturer’s instructions, and your machine will thank you with years of reliable performance. This isn’t optional—it’s essential maintenance.
Filling the Water Tank Properly
The water tank is your machine’s lifeblood. Remove it from the machine, rinse it thoroughly, and fill it with fresh, filtered water. Why filtered? Because tap water minerals can accumulate inside your machine, creating scale buildup that affects temperature, pressure, and taste. Using filtered water is an investment in both flavor and longevity.
Always use cold water for the initial fill. Most DeLonghi machines have an internal heating element that brings water to the proper temperature, so you don’t need to pre-heat it. The water tank is typically transparent or translucent, so you can easily see when it’s running low.
The Complete Process: How to Brew Your First Espresso
Now comes the exciting part. Let’s walk through brewing a proper espresso shot from start to finish. This is where everything comes together.
Step One: Loading and Adjusting Your Beans
Open your bean hopper and pour in fresh, whole coffee beans. You want beans that are recent—ideally roasted within the last two to four weeks. Old beans produce stale, flat shots, and you deserve better than that. The type of bean matters too. For espresso, you’ll want a medium to dark roast that’s specifically blended for espresso brewing.
Now here’s where your DeLonghi machine really shines: adjustable grind settings. Most models have a dial or digital setting that lets you choose from fine to coarse. For espresso, you want a finer grind than you would for drip coffee. The machine will grind beans automatically right before brewing, which means you’re always working with fresh grounds. This is a huge advantage over pre-ground coffee.
Step Two: Selecting Your Drink and Adjusting Strength
Your DeLonghi machine typically has buttons or settings for different drink types. You might see options like espresso, coffee, cappuccino, or latte. Select the one you want to make. At the same time, you can usually adjust the strength of your shot—more grounds and longer extraction for a bolder taste, less for something milder.
Most machines also let you set the cup size. A single espresso is typically one ounce, a double is two ounces, and so on. Programming this correctly ensures you get the right amount of coffee in your cup without under-extraction or over-extraction. Don’t guess on this—check your machine’s manual for the exact specifications.
Step Three: Activating the Grind and Brew Cycle
Place your cup under the spout—this seems obvious, but you’d be surprised how many people forget. Press the brew button, and watch as your machine goes to work. You’ll hear the grinder whirring as it pulverizes your beans to the perfect consistency. The ground coffee automatically feeds into the portafilter, compacts, and locks into place. This all happens within seconds.
The brewing process itself takes about 25 to 30 seconds for a proper espresso shot. You should see a rich, dark stream flowing into your cup, not a quick gush or a slow dribble. The perfect extraction looks almost alive, with a golden crema (that foam layer on top) forming as it flows.
Understanding Extraction and Crema
Extraction is where the real art of espresso lives. When hot water passes through your ground coffee under pressure, it dissolves soluble compounds that create flavor, body, and aroma. Too fast, and you get sour, under-extracted shots. Too slow, and bitterness dominates. The sweet spot is usually between 25 and 30 seconds of water flowing through the puck.
Crema is that rich, caramel-colored foam sitting on top of your shot. It’s not just pretty—it’s an indicator of proper extraction. A good crema should be about a quarter-inch thick and last for a minute or two. If you’re not getting crema, your grind is probably too coarse, or your machine’s pressure isn’t quite right.
Making Milk-Based Drinks: Cappuccinos and Lattes
Espresso is fantastic, but let’s be honest—many people prefer their coffee dressed up with milk. This is where your DeLonghi’s integrated milk system becomes invaluable.
Using the Automatic Milk Frother
Most DeLonghi all in one machines feature an automatic milk frother that does the heavy lifting for you. Here’s how it works: fill a container with cold milk (not hot, not room temperature—cold), insert the frother pipe, and press the cappuccino or latte button. The machine heats and froths the milk while simultaneously pulling your espresso shot. Everything is timed perfectly so your espresso and milk finish at the same moment.
The milk should transform into something silky and smooth with tiny bubbles throughout. This microfoam is what elevates a basic milk drink into something special. The automatic function takes the guesswork out of steaming, making it accessible even if you’ve never frothed milk before.
The Manual Milk Wand Option
Some DeLonghi models include a manual steam wand if you prefer hands-on control. Yes, there’s a steeper learning curve, but many coffee enthusiasts prefer the precision and tactile feedback. To use it, place the tip just below the surface of cold milk, activate the steam, and angle the pitcher to create a whirlpool effect. This incorporates air while heating the milk simultaneously. It takes practice, but once you master it, you’ll appreciate the control.
Troubleshooting Common Issues
Even the best machines sometimes act up. Let’s talk about what to do when things aren’t working as expected.
Your Espresso Tastes Sour or Weak
If your shots taste sour or thin, you’re likely dealing with under-extraction. This usually means your grind is too coarse. Try adjusting the grind setting to something finer and run another shot. You might also need to program a longer extraction time if your machine allows it. Sometimes simply using fresher beans helps because old beans don’t extract properly no matter what you do.
Your Espresso Comes Out Too Bitter or Burns Your Mouth
Bitterness indicates over-extraction. Your grounds are too fine, or the water is spending too much time passing through them. Coarsen your grind slightly and try again. If that doesn’t help, check your water temperature. Some DeLonghi machines have temperature adjustments in the menu. Dialing it back a few degrees can make a huge difference.
The Machine Isn’t Producing Proper Pressure
Without adequate pressure, you can’t make real espresso—just really strong coffee. If your machine feels weak, it probably needs descaling. Scale buildup inside the heating element reduces pressure. Run your descaling cycle according to the manual. If that doesn’t work, the machine might need professional servicing.
Milk Isn’t Frothing Properly
If your milk frother is producing hot milk but no foam, the milk is probably too warm. Always start with cold milk from the refrigerator. Also check that the frother nozzle isn’t clogged. A simple rinse under hot water while pressing the purge button usually clears it right up. If steam is leaking from odd places, the seals might need replacement.
Daily Maintenance and Care
Your DeLonghi machine is an investment, and like any investment, it deserves proper care. A few minutes of daily maintenance prevents major problems down the road.
What You Should Do Every Single Day
After each use, purge the group head by running water through it without any coffee. This removes residual grounds and prevents them from hardening inside. Wipe down the portafilter and gasket with a soft cloth. Empty and rinse the drip tray to prevent overflow and mold growth. If you used the milk frother, immediately rinse it with hot water to prevent milk from drying and clogging the nozzle.
Never let milk sit in or on your frother. It hardens quickly and becomes nearly impossible to remove, plus it breeds bacteria. Cleaning takes maybe two minutes, and it saves hours of frustration later.
Weekly Deep Cleaning
Once a week, remove the portafilter and basket and soak them in hot water with a tablespoon of espresso cleaning powder. Let them sit for 15 minutes, then brush out any trapped grounds with a soft brush. This prevents rancid oil buildup that can affect your shots’ flavor. The cleaning powder dissolves oils that water alone can’t remove.
While your portafilter is soaking, run a cleaning cycle if your machine has one. This sends hot water and cleaning solution through the group head, flushing out all the hidden spots you can’t reach. It’s like a spa day for your espresso machine.
Mastering Advanced Techniques
Once you’re comfortable with the basics, you can level up your espresso game with some advanced techniques that really showcase what your DeLonghi can do.
Dialing in Your Grind
Professional baristas spend hours “dialing in”—finding the exact grind setting that produces perfect shots with their specific beans and machine. You can do this too. Start with your machine’s recommended setting, then make small adjustments. If your shot runs fast and tastes sour, go finer. If it’s slow and bitter, go coarser. Keep adjusting until you hit that sweet spot where your double espresso takes 25-30 seconds and produces a beautiful caramel stream with thick crema.
Write down your preferred settings. Different beans might require different grinds, so keeping notes helps you dial in faster next time.
Creating Latte Art
If your DeLonghi has a manual steam wand, you can learn latte art. Pour your espresso into a cup, then pour your steamed milk from a height, gradually lowering the pitcher as the cup fills. The movement creates patterns in the crema. It’s part science, part art, and completely optional—but it’s a fun challenge once you’ve mastered basic milk steaming.
Understanding Your Machine’s Settings and Features
Most DeLonghi all in one machines have menus and settings that you might not explore. Let’s talk about what these actually do and why they matter.
Water Hardness and Descaling Alerts
Your machine has a water hardness setting. Test your tap water’s hardness using the provided strip, then input the result into your machine’s menu. This tells the machine when it needs descaling. Some machines alert you when descaling is due, others handle it automatically. Setting this correctly ensures you’re descaling often enough to prevent damage but not so often that you’re wasting time and money.
Temperature Adjustments
If your machine allows temperature tweaking, higher temperatures generally produce bolder shots with more body, while lower temperatures produce brighter, more delicate flavors. Different beans shine at different temperatures, so experiment and find what you prefer.
Choosing the Right Beans for Your Machine
Your machine is only as good as the beans you put in it. Beans are where most of the flavor comes from, not the machine itself.
Buy whole beans from a local roaster if possible. They’re fresher than supermarket beans and specifically roasted with espresso in mind. Single-origin beans offer distinct flavors that reflect their growing region, while blends balance different beans to create a consistent product. For espresso, you typically want medium to dark roasts that have enough body to withstand the high pressure and temperature.
Store your beans in an airtight container away from light, heat, and moisture. They’re best used within two weeks of roasting, so don’t buy more than you can use in a month. You’ll notice a huge difference in quality between beans roasted this week versus six months ago.
Conclusion
Your DeLonghi all in one espresso machine is a powerful tool that can transform your daily coffee ritual into something special. From pulling your first shot to mastering latte art, the journey is rewarding and delicious. Remember that learning espresso is a process—your first shots might not be perfect, and that