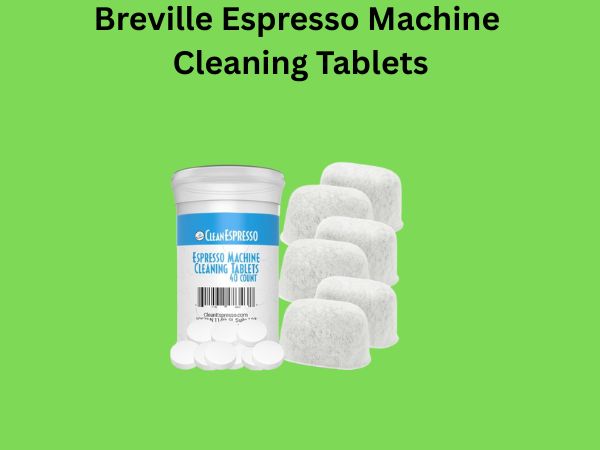

How to Descale a Breville Espresso Easily
The easiest way to descale your Breville espresso machine is by using a descaling solution and following the manufacturer’s recommended cleaning cycle. This process removes mineral buildup, ensuring your machine functions perfectly and your coffee tastes its best. Regular descaling prevents damage and keeps your espresso tasting rich and flavorful.
Mineral deposits, often from your water, can clog your Breville’s internal components over time. This buildup can affect brewing temperature and pressure. By descaling, you’re not just cleaning; you’re preserving your investment and enjoying consistently great coffee. Many users report a noticeable difference in taste and performance after a good descaling.
- Use a Breville-approved descaling solution.
- Run the machine’s cleaning cycle.
- Rinse thoroughly with fresh water.
- Descale every 2-3 months.
Ready to get your Breville back in top shape? Let’s walk through exactly how to descale it step by step.
Mineral buildup happens. It’s just a fact of life for any espresso machine that uses water. Think of it like chalk in your showerhead or a mineral crust on your favorite teapot. Over time, these tiny mineral particles from your water can accumulate inside your Breville. This is especially true if you have hard water. If you don’t deal with it, this gunk can really mess with your machine’s performance. It can make your coffee taste a bit off, or worse, start to damage your machine.
Keeping Your Breville Brewing Perfectly
Descaling is your machine’s spa day. It’s the process of removing those pesky mineral deposits. This keeps your Breville working like a champ. It ensures your espresso is always rich, flavorful, and at the right temperature. We want your morning brew to be amazing, right? Regular descaling is key to that.
Why Descaling Matters More Than You Think
So, why is this so important? Well, those mineral deposits act like tiny speed bumps inside your Breville’s water lines and heating elements. When these get clogged, your machine struggles. It might not heat water to the optimal temperature for brewing. It might not maintain the correct pressure. This can lead to a weak, bitter, or just plain disappointing cup of espresso. Plus, forcing your machine to work harder against these blockages can shorten its lifespan. We want your Breville to be a long-term coffee companion!
How Often Should You Be Descaling?
The general recommendation is to descale your Breville espresso machine every 2 to 3 months. However, this can vary. It really depends on how often you use your machine and the hardness of your water. If you use your machine multiple times a day, or if you know you have very hard water, you might need to descale more frequently. Some Breville models have a built-in “Clean” or “Descale” indicator light. Pay attention to that! When it lights up, it’s a clear signal it’s time for a cleaning.
Gathering Your Descaling Supplies
Before you start, make sure you have everything you need. This will make the process smooth and efficient. You don’t want to stop halfway through because you’re missing something!
The Essential Descaling Solution
When it comes to descaling solutions, you have a few options. The best and safest bet is to use a descaling solution specifically designed for espresso machines. Breville recommends its own brand of descaling solution. You can also find other reputable brands that are safe for use in Breville machines. Look for solutions that are citric acid-based, as these are generally effective and less harsh than some alternatives. Always check your Breville’s manual for their specific recommendations.
Why not just use vinegar? Many people wonder about using household vinegar. While vinegar can descale, it’s often not recommended for espresso machines. We found that some experts warn it can be too harsh and might damage internal seals or plastic components. It can also leave a lingering taste or smell that’s hard to get rid of. It’s best to stick with a purpose-made descaling solution for your machine’s longevity and your coffee’s flavor.
Other Items You’ll Need
Aside from the descaling solution, you’ll want:
- A clean basin or bowl large enough to catch water from the steam wand and drip tray.
- Clean water for rinsing.
- A soft cloth for wiping down the machine.
- Your Breville espresso machine’s user manual (always a good reference!).

The Step-by-Step Descaling Process
Now for the main event! Let’s get your Breville sparkling clean inside. This process usually takes about 30-45 minutes, depending on your model and how thorough you want to be with rinsing.
Step 1: Preparing the Machine and Solution
First, make sure your machine is turned on and has reached its normal operating temperature. Empty the drip tray and water tank. You’ll need to fill the water tank with a mixture of descaling solution and water. The exact ratio will be on your descaling solution’s packaging or in your Breville manual. If you’re using the Breville descaling solution, it typically involves filling the tank with a specific amount of solution and then topping it up with fresh water. It’s often a 50/50 mix or a specific concentration.
Step 2: Running the Cleaning Cycle
This is where your Breville does most of the work! Most Breville models have an automated cleaning cycle. You’ll typically need to press and hold a specific button or combination of buttons to initiate it. Your manual will tell you the exact sequence for your model. Once activated, the machine will start pumping the descaling solution through its internal components and out through the group head and steam wand.
The cycle usually lasts for about 15-20 minutes. During this time, the machine will pause and heat, then pump again. You’ll see the solution flowing out. Make sure your drip tray is positioned to catch this fluid. If it gets full, empty it and put it back. You might also want to direct the steam wand into your basin to ensure that line is flushed too.
Step 3: Rinsing the System Thoroughly
Once the cleaning cycle is complete, discard the used descaling solution from the drip tray. Rinse the drip tray thoroughly. Now, you need to flush out any remaining descaling solution from the machine. Fill the water tank with fresh, clean water. Run several full tanks of water through the machine using the hot water function or by initiating another brew cycle without coffee grounds. Again, let the water run through the group head and steam wand into your basin. This step is critical to ensure no traces of the descaling solution are left behind. We found that running at least two full tanks of water is a good practice.
Step 4: Final Touches and Checks
After rinsing, empty and clean the drip tray one last time. Wipe down the exterior of your Breville with a damp cloth. Reassemble any parts you removed. Your machine should now be free of mineral buildup and ready to make delicious espresso again!
Troubleshooting Common Descaling Issues
What if the “Clean” light stays on? Sometimes, the machine might not recognize that the cleaning cycle has been completed. Try emptying and refilling the water tank with fresh water and running another hot water cycle. If the light persists, consult your Breville manual. It might require a specific reset sequence. Did you use enough solution? Make sure you followed the recommended proportions for the descaling solution. Too little might not be effective.
Here’s a quick checklist to keep you on track:
- Empty drip tray and water tank.
- Mix descaling solution and water per instructions.
- Initiate the machine’s cleaning cycle.
- Run cleaning cycle until complete.
- Discard used solution.
- Rinse thoroughly with fresh water (multiple tanks).
Conclusion
You’ve successfully learned how to descale your Breville espresso machine. This process is vital for maintaining its performance and ensuring every cup is delicious. By regularly removing mineral buildup, you protect your investment and enjoy consistently great coffee. Make descaling a part of your routine, just like grinding beans or tamping espresso. Your machine, and your taste buds, will thank you for it! Next time your Breville’s clean light comes on, you’ll know exactly what to do.
Frequently Asked Questions
What if my Breville doesn’t have a specific “clean” or “descale” button?
Some older or simpler Breville models might not have a dedicated cleaning cycle button. In these cases, you’ll need to manually run the descaling solution through the machine. Follow the steps for preparing the solution, then use the hot water dispensing function to push the solution through the group head and steam wand. Consult your specific model’s manual for the best manual cleaning method.
Can I use a generic descaling solution instead of Breville’s brand?
Yes, you can use a generic descaling solution, but make sure it’s specifically formulated for espresso machines and is citric acid-based. Always check your Breville manual for any warnings against certain types of descalers. Using a solution not approved for your machine could potentially void your warranty or damage internal components. It’s always safest to use Breville’s recommended solution if possible.
How do I know if my Breville espresso machine needs descaling?
Many Breville machines have a “Clean” or “Descale” indicator light that illuminates when it’s time for maintenance. Beyond that, you might notice a change in your espresso’s taste (it could become weaker or more bitter), or your machine might start taking longer to heat up. If you have very hard water or use your machine frequently, consider descaling on a more regular schedule, even without the indicator light.
Is it really necessary to rinse the machine so thoroughly after descaling?
Yes, thorough rinsing is absolutely essential. The descaling solution is effective at breaking down minerals, but any residue left behind can affect the taste of your coffee and could even be harmful. Running multiple tanks of fresh water through the machine ensures all traces of the descaling solution are flushed out of the internal pipes and heating elements, leaving your machine clean and safe for brewing.